PRODUCTS
How To Clean A Weed Grinder
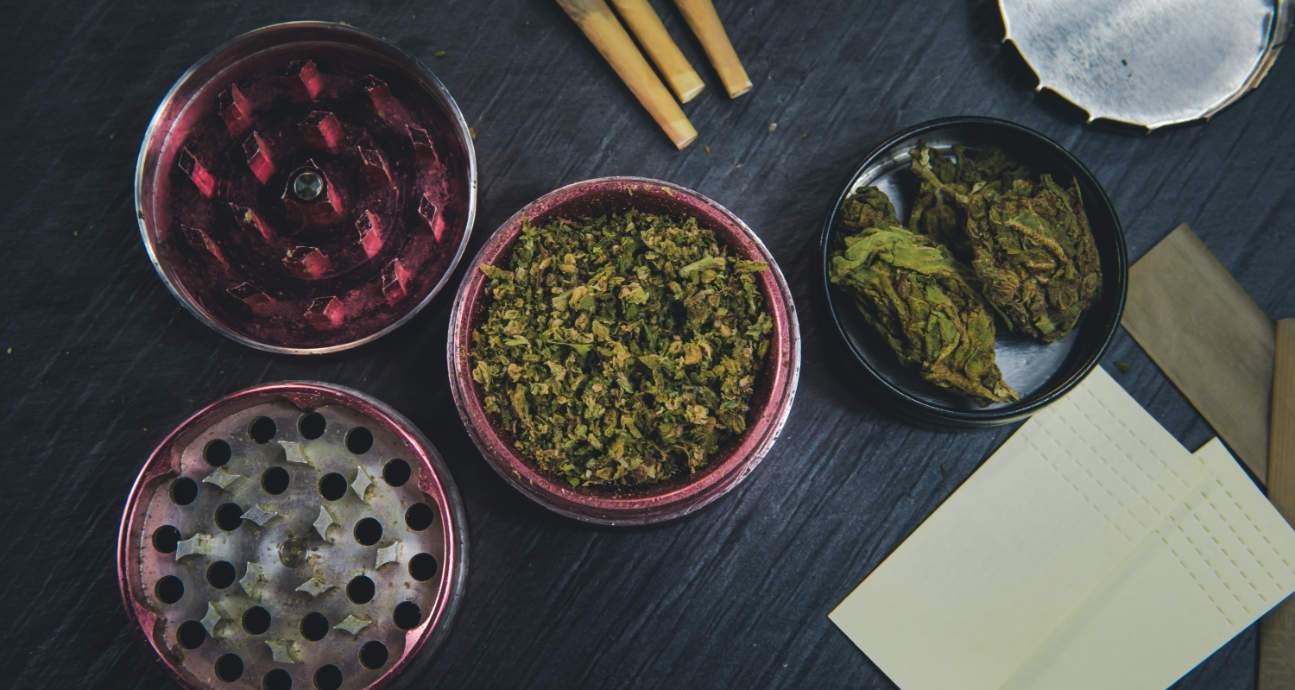
We don’t think twice about cleaning our gravity bong, dab pen, or weed bubbler. However, many of us neglect cleaning our weed grinder. Now ask yourself, what kind of smoke session would it be without this tool? Weed grinders ensure a smooth cut for an even smoke, all without getting your hands dirty…literally.
Instead of treating this smoke sesh essential like the red-headed stepchild, we should provide our weed grinder with the same dignity as our bubbler. Thanks to Higher Mentality, it’s easier than ever. Here is how to clean a weed grinder for optimal performance.
Why Clean Your Weed Grinder?
As you use your weed grinder, it’s custom for little flakes to get caught in the teeth of the device. Many look at this clog up as a bit of extra for later, and that the left-behinds will just break off in the next grind.
However, that’s not always the case.

When grinds get caught in between teeth, adding more bud on top can compact the old weed further into the mechanism. Other times, the plant fiber is firmly entangled around one of the teeth, and it’s going to take a little extra elbow grease to remove than just twisting it with more bud.
Cleaning your weed grinder may seem burdensome, but it’s essential for optimal smoke sessions. Here are a few reasons why you need to clean your weed grinder.
Sharpness of Teeth
Cleaning a weed grinder isn’t about polishing the outside. You should be more concerned about what’s going on under the hood. The whole reason you buy a weed grinder is that its teeth are more efficient are breaking up bud than your fingers are.
Depending on the quality of your weed grinder, some teeth are made with a proprietary design. For instance, the Aerospaced 4 pc Grinder has teeth that have a diamond-shaped cut.

These measures are taken to ensure the same precision of slice with every grind of the bud.
When weed gets caught in the crevices, it becomes one with the teeth. Instead of breaking off with future buds, your old weed actually dulls the mechanism attempting to cut your new weed. Therefore, not cleaning your weed grinder changes the shape of the teeth, making them less effective.
It Costs You Money
One of the main reasons you buy a weed grinder in the first place is because bud can be pretty sticky. Investing in a weed grinder saves you money because you aren’t just shoving random clumps into your Commander Blunt Bubbler.

The teeth can withstand the stickiness of the fresh herb and still shred it into fine pieces, so you get a more even smoke from your piece.
For the most part, even the stickiest of weed will leave your grinder to be used in your bubbler. However, there will be some residual bud in your grinder. That’s because it’s sticky.
Anyone who breaks up weed is all too familiar with its smell. Breaking it up causes terpenes (aromatic compounds) to release from the plant. These compounds come from the plant’s oils. Grinding weed causes the shredded plant to sweat oils. As a result, some remnants attach to the teeth. In turn, future sticky weed particles may stick to these older sticky pieces. Over time, you end up losing precious THC molecules.
Sanitary Reasons
Whenever you pick a plant, it oxidizes. So, when you use a weed grinder, remaining weed will also release oxygen. In turn, that will create moisture.
Even the highest-grade aluminum weed grinders are still susceptible to maintaining a little bit of wetness in the atmosphere. A weed grinder that is never cleaned can become a breeding ground for mold or bacteria. These can alter the potency of future smoking sessions and can also become a potential health risk.
An Easy Way to Clean Your Weed Grinder
Now that you know why you should clean a weed grinder, let’s get down to the how. We’ll start off with a list of ingredients you will need
- Toothpick or cotton swab
- Toothbrush
- Isopropyl Alcohol
- Rubbing Alcohol (For Metal Grinders Only)
- Towel
As you can see, you just need a few around-the-house items to complete this task, but there are a few tools and gadgets that might make this process easier. Here are a few inside tips:
Step 1: Prepare The Weed Grinder for Cleaning
The first step is to get your weed grinder ready. If you have a multiple chamber weed grinder which collects pollen, such as the Santa Cruz Shredder, you need to disassemble the pieces.

From there, transfer any of the kief from your weed grinder into a smell proof box with a Boveda 62% Humidipak.
Pro Tip: Put the weed grinder pieces in your freezer about a half hour before you plan on cleaning. Doing this will harden the weed particles and make them less sticky and easier to manipulate out of your device. After the half-hour has elapsed, tap out any remaining pieces from your screens or teeth into the smell proof box for future enjoyment.
Step 2: Brush Out the Weed
Next, take your cotton swab or toothpick, hold the compartments of the weed grinder over your smell proof box and scrape out any loose particles. Once you believe you’ve exhausted this step, pour some isopropyl alcohol into a bowl.
Dip your toothbrush into the bowl and then work away at the stubborn weed particles. Get into the little nooks and crannies within the teeth.
Pro Tip: For a deeper cleaning, invest in a Higher Standard’s Supreme Clean Kit. It comes with Pipe Stix and a Stem Brush that can get deep into areas in need of cleaning. Not only is it handy for cleaning a weed grinder, but it’s perfect for taking care of glass water pipes as well.
Step 3: Clean the Entire Weed Grinder (For Metal, Plastic, Acrylic Only)
If you have a wood weed grinder, skip this step. For those with metal, keep the weed grinder apart. Pour rubbing alcohol into a sandwich bag. Place the metal pieces into the bag, seal it up, and give a good shake.
If you have a plastic or acrylic grinder, don’t use rubbing alcohol. Instead, put the weed grinder pieces into a pot of water and allow them to boil. Once bubbling, remove from heat and allow to cool for ten minutes.
When you are done with either method, carefully remove the weed grinder pieces. Grab your brush and get any remaining gunk out of the crevices.
Pro Tip: For some, the smell of rubbing alcohol lingers in the weed grinder for a long time. You can avoid this unpleasant scent by getting an all-natural alternative like Piece Water Solution.

While customized for the use of glass water pipes, this cleaning tool will not chip away the paint on a device such as the Lilac Aerospaced 4 Piece Grinder.
Step 4: Allow to Dry
This next step is crucial. You don’t want to throw weed into your grinder while it’s still wet since it may not light up in your weed bubbler. If you have time, allow it to air dry.
If you want to expedite the process, use a paper towel to work around the screens softly. Don’t rub too vigorously, or you might ruin the microns. In turn, your kief particles will be larger.
Pro-Tip: In the case of an emergency, use a hairdryer. However, you can avoid the whole process by opting for a toothless grinder. The Groove Grinder has a proprietary design that incorporates innovative coaxial turbine technology. This piece finely slices your bud, leaving no chunks behind to lock up the grinder’s teeth. Without any teeth, the Groove Grinder requires little cleaning and offers consistent chopping of bud.


Merry Jane’s Jim Baudino Gets Into The Weeds
.Merry Jane’s Jim Baudino Gets Into The Weeds on Episode 68 of Puff Digital’s Cannabis Infused Long From Interview Podcast...


Famed Photographer Ophelia Chong returns to Into The Weeds
Famed Photographer Ophelia Chong returns to Into The Weeds along with genius marketing consultant, Chris Husong On episode 69...


Legendary Cannabis Advocate Jamie Shaw Gets Into The Weeds
Las Vegas Sessions continue with legendary cannabis advocate Jamie Shaw getting into the weeds on ITW Podcast On episode 67...


